Creating payment schedules
What are payment schedules?
Payment schedules allow you to create invoices that can be paid in multiple instalments rather than in one go. They are useful if you have to invoice your customer multiple times over the course of a project or if you want to offer your customers a flexible way to pay.
Payment schedules are completely customisable, depending on the situation and your customer’s needs. Choose how many instalments you want your customer to pay in, when they need to pay them, and whether you want to set the payment schedule as a single invoice or split across several invoices.
Please note that this function is a Premium feature available to subscribers of our Zervant PRO plan or higher.
Creating payment schedules
1. Go to the tab >Invoice
2. Create a >new invoice as usual
3. Check the box >Payment schedule on the right-hand panel under the settings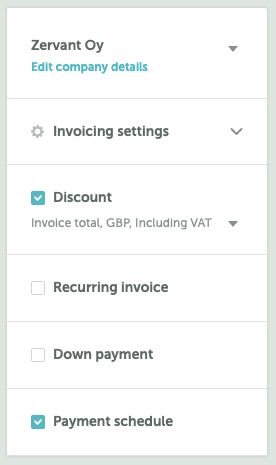
4. Click on >Edit payment schedule below the total amount due of the invoice to setup.
5. Here, you can select whether to include all instalments on one invoice or to split across multiple invoices as well as number and frequency of payments (e.g., weekly, monthly, etc.; create up to 12 instalments per payment schedule). Set the amount of each instalment (as percentage of the total or specific amount), the due dates, the project names (if separate invoices for each payment), and whether or not to include pro-rated VAT (i.e., distributed proportionally).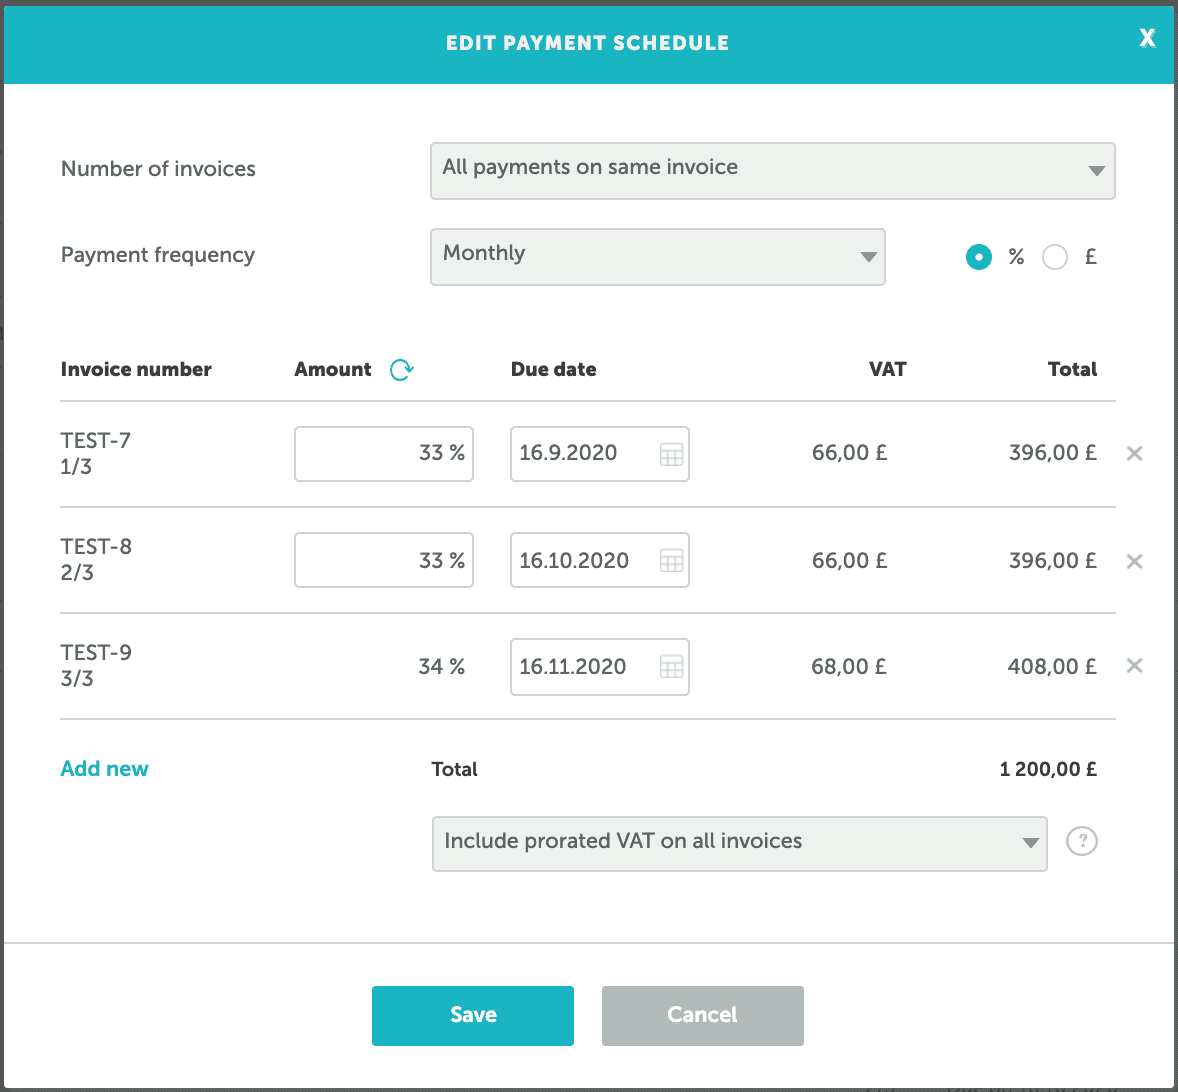
6. >Save your payment schedule settings. The instalments, along with their prospective invoice numbers (if split across multiple invoices), due dates, and amounts, will then be shown at the bottom of your invoice below the Total amount due.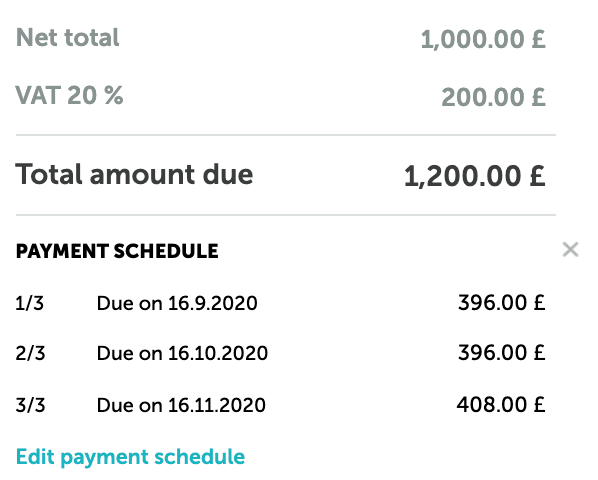
7. >Approve and send your invoice(s) to your customer as normal
Please note:
- Payment schedules are only available on our Zervant Premium plans PRO and above
- Once your customer has paid the first instalment (on a single invoice), your invoice status will be set as >Sent. You can only mark your invoice as Paid after all instalments have been paid
- When creating a payment schedule with multiple instalments split across several invoices, you can select whether to send the first invoice only or all invoices at the same time. If you choose to only send the first invoice, the other invoices in the payment schedule will be created at the same time and can then be manually sent from the tab Invoices as needed
- When separating your instalments across multiple invoices, each instalment invoice will receive the next invoice number in line with your invoice numbering sequence. Each invoice will also show an appropriate project name (e.g. Project 1/2, Project 2/2)
- If you have added a down payment to your invoice, it is necessary to ensure that the down payment amount is set as the first instalment in the schedule. The down payment and remainder due will now be visible on the invoice below the Total amount due
- Invoices with payment schedules enabled cannot be copied as new
- You can only create a credit note if you payment schedule is set up on a single invoice only
- When separating instalments across multiple invoices, you cannot edit the individual invoices. However, payment schedules on single invoices only, can be edited
- The issue date will be the same for all invoices, even if the due dates are different
- If your client wants to pay single instalments using online payments, the instalments will need to be split across multiple invoices rather than on one invoice only